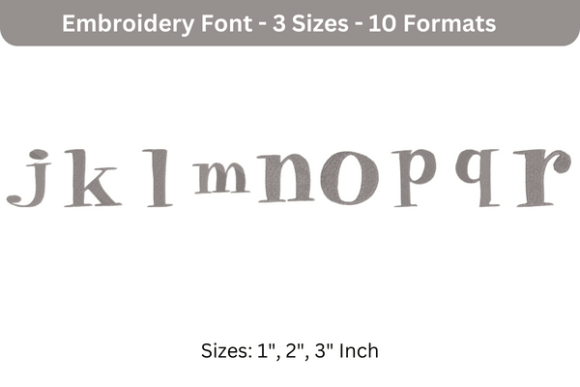
Pixie Font J to R: A Delicate, Playful Stitch That Demands Intention
As someone who’s stitched hundreds of custom names onto baby onesies, embroidered boutique tote bags for back-to-school launches, and pre-screened fonts for Etsy sellers’ digital embroidery files—I opened Pixie Font J to R expecting charm. What I found was something more nuanced: a light-footed, slightly whimsical machine embroidery design that shines brightest when treated like a thoughtful accent—not a workhorse.
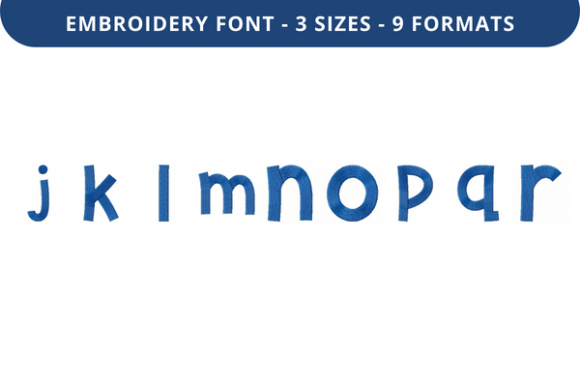
I tested it on a linen-cotton tea towel destined for a teacher’s welcome gift (a classic back-to-school handmade product), then moved to a medium-weight cotton sweatshirt for a small shop’s personalized apparel line. Right away, the personality clicked: soft curves, open letterforms, and gentle tapering on stems and crossbars. It doesn’t shout—it invites. That makes Pixie Font J to R ideal for products where warmth and approachability matter more than boldness: nursery decor, baby embroidery, handwritten-style quotes on pillow covers, or delicate monograms on kitchen towels.
Where Pixie Font J to R Feels Like Home
This isn’t a font for dense fill-stitch slogans on trucker caps or high-contrast satin-stitch logos on dark hoodies. Its strength lies in breathing room—literally. The spacing between letters is generous, and the stitch density leans lighter than average. That translates beautifully on:
- Medium-weight woven fabrics like quilting cotton, linen blends, and stable twills—where stabilizer holds well and thread glides cleanly;
- Flat, low-curve surfaces such as tote bag fronts, apron pockets, or pillow covers—no distortion from stretching or seam lines;
- Personalized gifts with emotional weight: a child’s name on a keepsake blanket, a graduation date on a framed embroidery hoop, or a teacher’s name on a hand-stitched apron;
- Digital embroidery file previews for Etsy listings—its airy structure reads clearly even in small printable mockups, helping buyers visualize without zooming.
I used it for a set of six embroidered tea towels—each with a different student’s name (J through R, of course). Customers loved how “hand-lettered” it felt, even though it stitched flawlessly on my mid-range home machine. That handmade presentation? It landed. Not because it looked imperfect—but because it looked *considered*.
Where to Pause—and Plan Ahead
Don’t assume Pixie Font J to R will behave the same on every surface. On textured terry cloth or loosely knit French terry, the fine details—like the subtle curve on the lowercase “j” tail or the thin crossbar of the “t”—can blur or snag. On stretchy fabric like jersey or ribbed knit, even with cutaway stabilizer, those open shapes can distort under tension. And on dark fabric? Test thread contrast rigorously. A pale ecru or heather gray thread may vanish where you expect soft definition.
Small hoop sizes (under 4×4 inches) demand extra attention. The font’s natural rhythm relies on spacing—so cramming “Jennifer Rose” into a tiny circle risks crowding, uneven stitch pull, or lost legibility. Likewise, curved surfaces like baseball caps or rounded pillow edges subtly compress letterforms. I recommend using Pixie Font J to R for single names or short initials on caps—not full phrases.
What It Adds to Your Craft Business—Beyond Pretty Stitches
For Etsy sellers and small shop owners, this isn’t just another embroidery file. It’s a quiet brand amplifier. When customers see Pixie Font J to R on a finished product, they register care—not speed. That perception lifts perceived value, supports premium pricing, and builds trust. One buyer messaged me saying, “It looks like you spent time choosing *just* the right font.” That’s the power of intentional design assets.
But let’s be real: its delicacy means it won’t carry heavy commercial embroidery projects alone. Pair it thoughtfully—use it for names alongside bolder block fonts for slogans, or layer it over simple fill-stitch motifs (not dense applique designs). And never skip the test stitch. Run it on scrap fabric *with your exact stabilizer stack*, using the thread colors you’ll ship. Check corners, check starts/stops, check how the “R” loop lands after travel stitches.
Your Practical Designer Checklist Before Stitching
- Test Pixie Font J to R on scrap fabric matching your project’s weight and texture;
- Verify thread color contrast on both light and dark backgrounds—especially for holiday embroidery or back-to-school merchandise;
- Confirm hoop size compatibility; avoid forcing tight curves or small lettering into undersized hoops;
- Inspect stitch density: if it feels too sparse for your fabric, consider adding a light tack-down layer—or switch to a denser font for high-wear items like tote bag handles;
- Review licensing terms before selling finished products or bundling Pixie Font J to R into digital embroidery kits;
- Use black-and-white mockups to assess readability at scale—especially for craft fair signage or social media previews;
- When pairing with other design elements, ensure visual hierarchy stays clear: Pixie Font J to R should lead with grace, not compete.
In the end, Pixie Font J to R isn’t about versatility at all costs. It’s about resonance. It works because it knows its lane: soft, sincere, and quietly confident. Whether you’re stitching a baby embroidery set for a new parent, designing a limited-run sweatshirt collection for your small shop, or building a cohesive line of personalized gifts for the back-to-school season—it earns its place by making the ordinary feel tenderly intentional. Just remember: let it breathe, respect its rhythm, and always stitch with purpose.